Faucet & Sink
What Is a Self-Rimming Sink? Drop-In Fit Basics
A self-rimming sink sits on the countertop rim; check cutout coverage, faucet holes, cabinet clearance, material, and leak signs before buying.
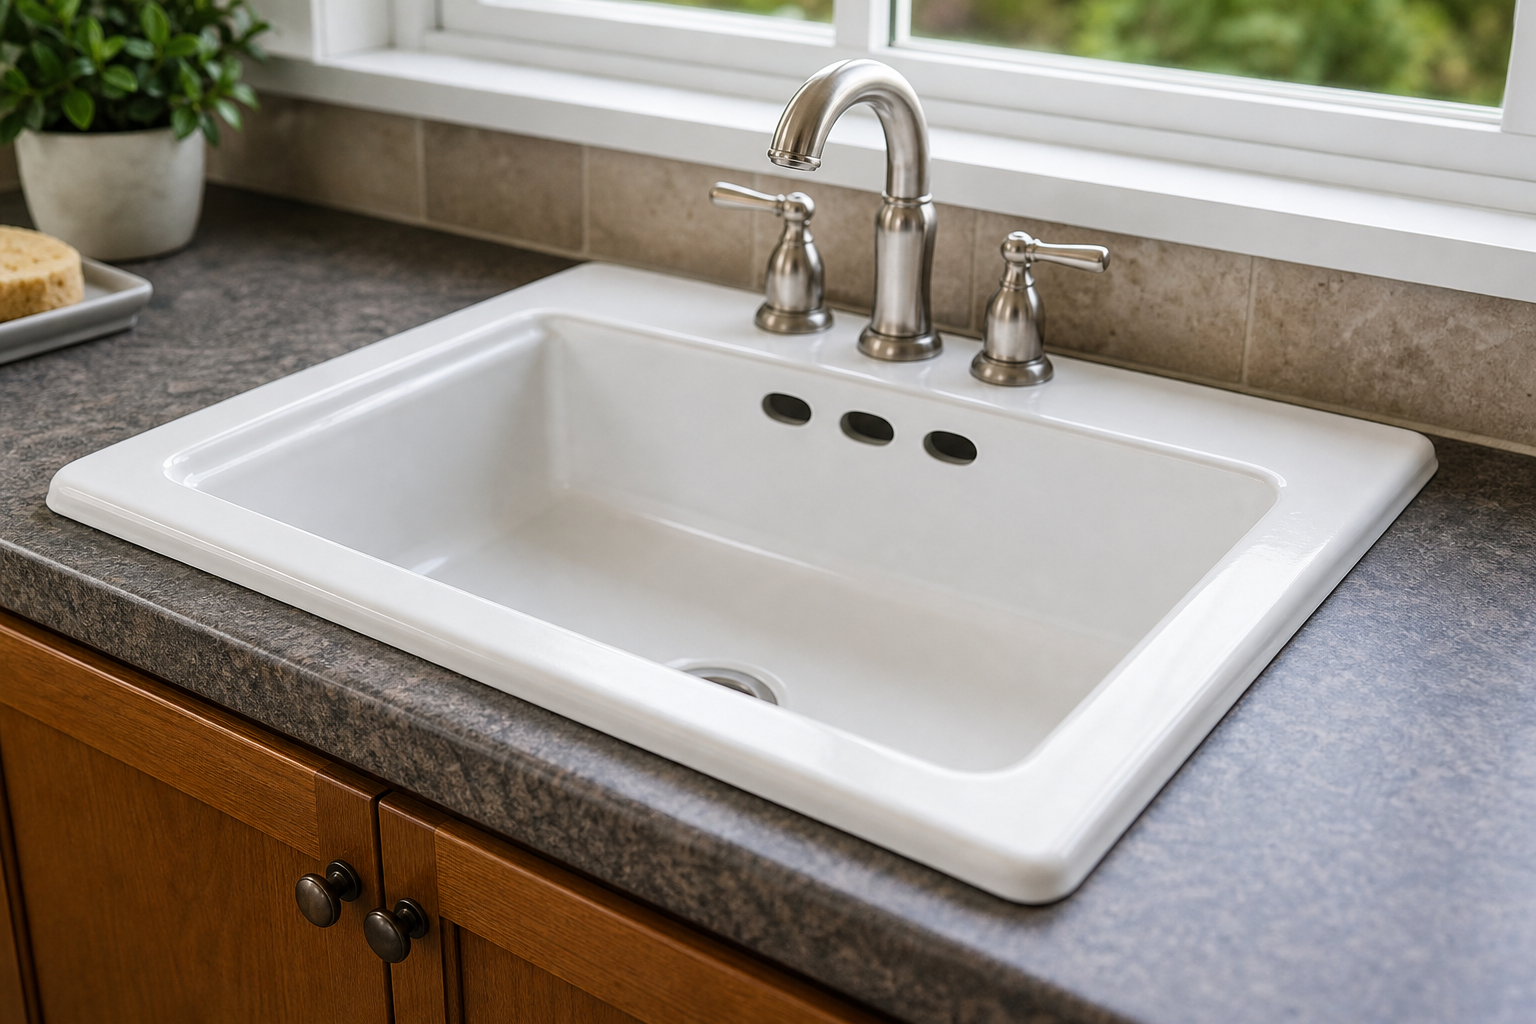
What to know about What Is a Self-Rimming Sink? Drop-In Fit Basics
A self-rimming sink, also called a drop-in or top-mount sink, has a visible rim that rests on top of the countertop and helps support the bowl. It is often easier to replace than an undermount sink, but the cutout size, rim coverage, faucet holes, cabinet clearance, countertop material, and seal condition all matter before you buy or remove anything.
Self-rimming vs undermount vs vessel sink
| Sink type | How it is supported | What homeowners should check |
|---|---|---|
| Self-rimming / drop-in | Rim sits on top of the counter; clips or hardware may help secure it | Rim width, cutout coverage, faucet holes, drain location, cabinet clearance. |
| Undermount | Mounted under the countertop with clips/adhesive/support | Countertop strength, edge finish, pro installation, waterproofing. |
| Vessel | Bowl sits above counter or partially recessed | Faucet height/reach, drain height, splash, vanity height. |
| Integrated top | Sink and counter are molded or fabricated as one unit | Replacement usually means replacing the whole top. |
Fit checklist before shopping
- Measure the visible outside rim and the inside bowl opening; do not rely on one dimension.
- Photograph the underside of the sink, clips, supply lines, drain, disposal, and cabinet clearance.
- Count faucet holes and measure spacing: single-hole, 4-inch centerset, 8-inch widespread, side sprayer, soap dispenser, or air-gap opening.
- Check whether the new rim will fully cover the old countertop cutout and any chipped laminate or stained caulk line.
- Confirm drain location, garbage disposal fit, tailpiece/trap alignment, and cabinet-door clearance.
Countertop and material caveats
Laminate, solid surface, stone, tile, butcher block, and cultured marble behave differently around sink cutouts. A heavy cast-iron or stone sink may need support the old cabinet cannot provide. A damaged laminate cutout or swollen particleboard may need countertop repair before any sink swap.
Seal, clips, and leak clues
| Clue | What it may mean | Safe next step |
|---|---|---|
| Dark line or swelling around rim | Old seal failed or countertop absorbed water | Photograph before disturbing; check cabinet below. |
| Sink moves when pressed | Clips/adhesive/support may be loose | Do not rely on caulk alone; plan repair or pro help. |
| Drips below after counter use | Rim seal, faucet base, or drain may leak | Dry cabinet and identify exact drip point. |
| Old cutout is larger than new sink template | New sink may not cover opening | Choose different sink or consult installer. |
What not to do
Do not cut the countertop, loosen plumbing, remove a disposal, or pry a sink out based only on a generic guide. Hidden clips, brittle countertops, old shutoff valves, and swollen cabinets can turn a simple sink swap into plumbing or countertop repair.
Bring this to the store or installer
- Photos from above and below the sink.
- Outside rim dimensions, bowl opening, and cabinet interior width/depth.
- Faucet-hole count and spacing.
- Drain/disposal photos and whether the trap is centered.
- Countertop material and any visible water damage.
Fixture, drain, and finish boundary
Decision aid: What Is a Self-Rimming Sink? Drop-In Fit Basics
Start by identifying the relevant symptom, fixture, or planning question before choosing parts or arranging work.
Write down when the issue began, what changed, which fixtures are affected, and any model or service-history details. That record makes it easier to compare the article with the exact product documentation and to explain the problem if qualified help is needed.
- Separate a faucet or supply symptom from a drain symptom, and note whether it affects hot water, cold water, or both.
- Match product-specific directions to the exact model manual and confirm local requirements where installation, gas, electricity, water quality, or structural work is involved.
- Stop if water reaches a cabinet, wall, floor, or electrical part, or if a shutoff or fixture starts to move when it should not.
Authoritative references for this topic
Use the current version of these sources to verify safety, efficiency, health, or product-specific details that apply to your situation.